1.Download template (at bottom of instructions).
Drag onto an 8 ½” x 11” page. Do Not Resize!
2. Choose a graphic. One that is looking straight ahead and has both a head and feet will work best.
3. Open graphic and drag onto page with template. Place graphic behind template. (Template should be clear except for the lines. If it is not, chose the white inside the template with the magic wand and delete.)
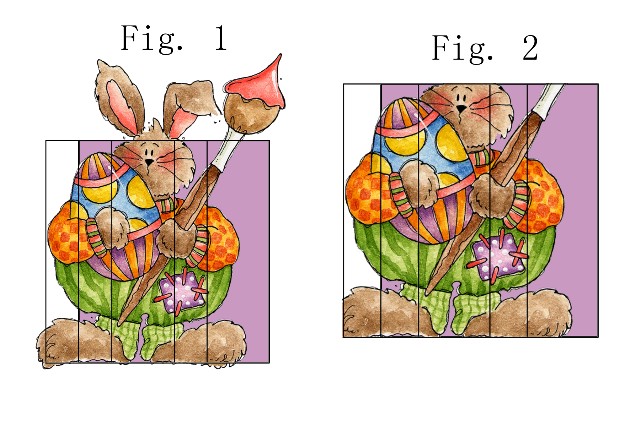
4. Resize graphic to fit template. You can have the head above or below the top of the template. But, you want the graphic centered in the large center panel. (Fig. 1 )

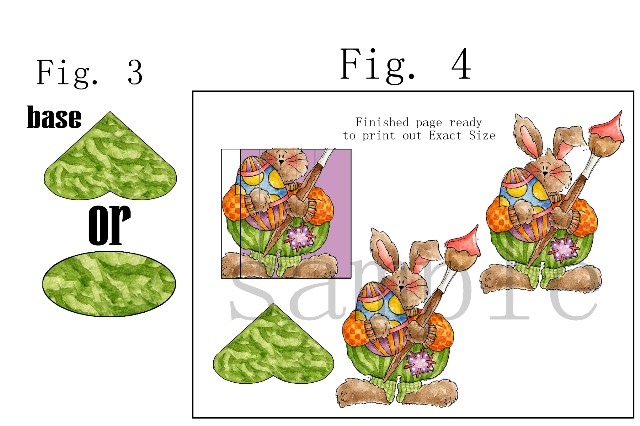
5. Copy the newly sized graphic and paste a second copy to the side. This will serve as the back support/panel of the gum holder. (If you wish to embellish your gum holder with a 3d effect add a third copy). (see fig. 4)
6. Go back to the template and cut away and delete all the graphic that is not inside the lines. (Fig. 2)
You can fill in white background around graphic with color or pattern or leave white.
7. You will need a base shape that is at least 2” x 1”. I usually use a heart as it looks mostly like feet, but any shape will do and a little larger is fine. Fill the base shape with a pattern or color. (Fig. 3)

8. Print EXACT SIZE. Sample of whole printout (Fig. 4)
9. Cut out pieces. Score template where lines are.
10. Fold and glue ends together. Match up gum box to graphic panel and glue together. (Fig. 5)
11. Put glue on bottom of gum box and figures feet and attach to center of base. (Fig. 6)
Let dry.
12. Embellish front with cut out pieces of third print if desired. Put in pack of gum.
*Note:: If template appears to large on your 8.5 x 11 inch page, reformat image to 300 dpi as that is what most of them are saved as.


